Planning
Car Audio on a Budget: Where to Spend First
Researched from published physics, alignment relations and manufacturer specifications. Updated .
Quick answer
A limited budget in car audio gets spent most efficiently when it goes toward the upgrades that unlock what is already installed, rather than toward the next big-ticket component. A poorly deadened door, a gain set by ear instead of a multimeter, or a factory electrical system left untouched can quietly limit a system far more than an amplifier upgrade would fix.
This guide ranks the highest value-per-dollar upgrades in the order they tend to pay off, so a tight budget goes toward the changes that matter before it goes toward more amplifier power that the rest of the system cannot fully use yet.
What is the single best value upgrade in car audio?
Door deadening and sealing the inner door skin is usually the best value upgrade available, and it is also the most commonly skipped because it produces no obvious spec sheet number. A stock door panel resonates and leaks bass energy out of the cabin, both of which rob a speaker of clarity and output it is already producing. Deadening the inner metal skin and sealing gaps around the speaker basket keeps more of that energy pointed into the cabin instead of buzzing the door panel or leaking outward.
The reason this ranks above amplifier or speaker upgrades is that it improves whatever is already installed, factory or aftermarket, at a material cost usually under fifty dollars per door and an afternoon of work.
Sealing matters as much as the deadening material itself. A speaker basket mounted over an open, unsealed hole in the door's inner skin lets air pressure escape backward into the door cavity instead of forward into the cabin, which undermines bass output regardless of how much deadening mat is applied elsewhere. A simple foam gasket or sealant bead around the mounting ring closes that gap for very little added cost.
Highest value-per-dollar upgrades, ranked
| Rank | Upgrade | Why it ranks here |
|---|---|---|
| 1 | Door deadening and sealing | Improves clarity and output of speakers already installed, low material cost |
| 2 | Correct gain setting with a multimeter | Free or near-free; prevents clipping that damages drivers and muddies sound |
| 3 | Big 3 upgrade | Removes resistance from an existing charging system rather than adding new equipment |
| 4 | Ported box over sealed for the same subwoofer | More output from the same driver and amplifier, at the cost of a larger box |
| 5 | More amplifier power | Only 3 dB gain per doubling of power; highest cost per audible improvement |
Convention Source: Common car audio upgrade prioritization based on cost versus audible impact. This ranking assumes a system with reasonably matched components already in place. A genuinely undersized or mismatched amplifier or subwoofer can still be the right first fix in some cases.
Why does gain setting rank above spending any more money at all?
Gain should be set with a multimeter and the target voltage formula V equals the square root of power times resistance, never by ear. Setting gain by ear routinely overshoots into clipping, and clipping, not high wattage itself, is what actually burns voice coils. A correctly set gain costs nothing beyond the multimeter already needed for other stages of the build and directly protects every dollar already spent on the amplifier and subwoofer.
Why does the big 3 upgrade rank above buying a new amplifier?
The big 3 upgrade, three heavy-gauge cables added alongside the factory alternator, ground, and engine ground wiring, addresses resistance that is quietly limiting whatever amplifier is already installed. A factory electrical system with excess resistance in its charging path can cause an amplifier to underperform its own rating, which looks identical to an underpowered amplifier from the driver's seat even though the amplifier itself is fine.
Because the big 3 typically costs well under two hundred dollars in cable and hardware and takes under two hours to install, it is cheaper than replacing an amplifier that was never actually the problem. Confirming the diagnosis first with the alternator output calculator and a voltage check under load avoids installing a big 3 that was not the actual bottleneck.
Is a ported box worth it over sealed on a tight budget?
A ported enclosure for the same subwoofer typically produces more output in its tuned range than a sealed box, without adding any amplifier power or new equipment beyond the box itself. The tradeoff is size, since a ported box for a given driver usually needs meaningfully more volume than a sealed one, and it needs a subsonic filter to protect the subwoofer from overexcursion below the tuning frequency, which is a setting rather than a purchase.
For a budget build where vehicle space allows it, moving from a sealed box to a properly designed ported box is a cheaper path to more output than upgrading the amplifier, since the subwoofer and amplifier stay exactly the same. Use the ported box volume calculator and port length calculator to confirm the design before cutting wood.
Material cost for a ported box is not always dramatically higher than a sealed one, since both are typically built from the same MDF, and the bigger cost difference tends to be labor if the box is being built rather than bought. A pre-built ported enclosure sized for a common driver can close that gap almost entirely, making a ported upgrade one of the more accessible options on this list for a builder without woodworking tools or time.
What you need for a high value-per-dollar upgrade path

Kilmat 80 mil, 36 sq ft
$69.95Butyl-based deadening mat covers doors affordably and is the first upgrade on this list for a reason.
Check price on Amazon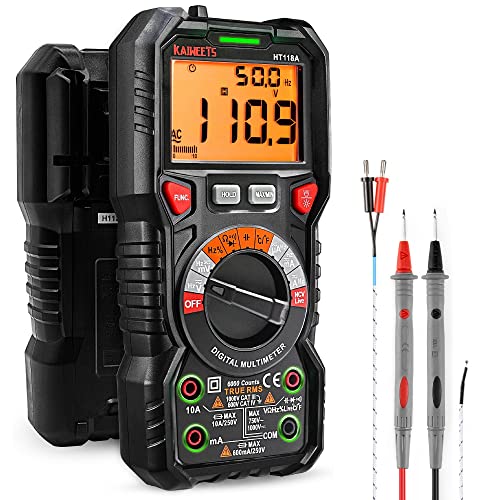
KAIWEETS automotive true RMS
$37.99A multimeter is required for setting gain correctly, and it does double duty checking electrical connections through the rest of the build.
Check price on Amazon
Sky High 1/0 OFC big 3
$96.95A complete big 3 kit in OFC cable covers all three connections without sourcing cable and lugs separately.
Check price on AmazonWhat should wait until later on a tight budget?
A bigger amplifier or a second subwoofer should generally wait until the upgrades above are done, since they only deliver a few dB of gain per doubling of power and cost far more per decibel than deadening, correct gain, the big 3, or a ported box redesign. A capacitor is another item worth deferring or skipping, since it does not fix a genuinely undersized electrical system, it only buffers momentary voltage sag, and the big 3 addresses the actual resistance problem a capacitor is often bought to mask.
Cosmetic upgrades, like RGB lighting or a flashy amplifier rack, are the last priority on any budget focused on sound quality, since they have no effect on output, clarity, or reliability no matter how much they cost.
An alternator or battery upgrade also belongs later on this list for most builds, not because electrical capacity never matters, but because a factory charging system paired with a properly executed big 3 and correctly set gain often has more headroom than people assume. Jumping straight to a high-output alternator or a second battery before confirming the factory system's actual limits with a voltage check under load, using the alternator output calculator as a reference, risks spending on capacity that was not the bottleneck in the first place.
Frequently asked questions
- What is the cheapest upgrade that makes the biggest difference in car audio?
- Door deadening and sealing the inner door skin is usually the best value, often costing under fifty dollars per door in material. It improves the clarity and output of speakers that are already installed by reducing panel resonance and bass leakage, which is a bigger audible change per dollar than most equipment upgrades deliver.
- Is setting gain correctly really worth prioritizing over new equipment?
- Yes. Setting gain with a multimeter using the target voltage formula costs nothing beyond a tool most builds already need, and it prevents clipping, which is the actual cause of blown voice coils rather than high wattage itself. A correctly set gain also protects the value of every other component already purchased.
- Should I buy a capacitor or do the big 3 upgrade first?
- The big 3 upgrade first. A capacitor only buffers momentary voltage sag and does nothing to fix the underlying resistance in a factory charging system, while the big 3 addresses that resistance directly. Many electrical symptoms that get blamed on needing a capacitor are actually solved by the big 3 alone.
- Is a ported box a good budget upgrade if I already have a subwoofer?
- Yes, if vehicle space allows the larger box a ported design typically needs. It increases output from the same subwoofer and amplifier without buying any new equipment beyond the enclosure itself, and it is generally cheaper than the amplifier upgrade that would be needed to get a comparable gain in output.
- Should I spend my remaining budget on a bigger amplifier?
- Only after deadening, correct gain setting, the big 3, and enclosure choice are addressed. More power only produces 3 dB per doubling, so it is the lowest value-per-dollar upgrade on this list, and it also raises the current draw that a marginal electrical system may not yet support, which can turn a straightforward upgrade into a bigger electrical project than expected.
- Do RGB lighting and cosmetic upgrades affect sound quality?
- No. Lighting, amplifier racks, and other cosmetic additions have no effect on output, clarity, or reliability, and on a limited budget they should come after every upgrade that actually changes how the system sounds or how safely it operates. They are worth adding once the deadening, gain, electrical, and enclosure work are already done, not before, since none of them make an underperforming system sound better.
Researched guidance, not professional advice. Value-per-dollar rankings assume components already in the system are reasonably matched to begin with. A genuinely undersized or damaged component may need to be addressed before these upgrades will show their full benefit.